Using llm-dev:cycle — a flexible framework for
structuring LLM-assisted development.
This is the first of three decks in the ASWP tutorial suite.
Deck 1 (this one) teaches the
llm-dev:cycle process for building things with
an LLM. Deck 2 walks through a real example
end to end — the differential-privacy explainer — using the
actual session transcripts and cycle artifacts.
Deck 3 covers enriching your slides with
well-sourced content and points to reveal.js as a future
option.
The deck is itself a vanilla HTML presentation built with the very process it teaches — so as you read it, you're looking at an example of the output. It runs entirely offline from a browser, no internet or software required.
Controls: arrow keys (or PageUp/Down, Space) move between slides; P opens a presenter view in a second window (these notes, the next slide, and a timer); F toggles fullscreen; S toggles this notes panel inline. Arrow keys work in the presenter window too, so you can drive the talk from either screen.
llm-dev:cycle
is a framework for providing LLMs with consistent
guidance.
The HTML slide deck you are reading right now was built
following this framework.
In the following slides, you will learn how to use
llm-dev:cycle
to build your own HTML slide decks (and other stuff) that
teachers can easily launch in a browser window.
If you'd like, you can install the entire
llm-dev plugin
for Claude Code.
All you really need to get
started are the
skill files
from the ASWP repo, though.
The goal of this tutorial is solo authorship: by the end,
each of us should be able to take a topic and produce a
finished, interactive HTML deck with an LLM doing the heavy
lifting. You do not need to know HTML or CSS to do
this. The real skill being taught is
directing the model well — and that's what
llm-dev:cycle structures.
Without structure, building with an LLM tends to drift into a long, meandering chat that loses the thread. The cycle replaces that with a repeatable set of phases, so results are consistent across people and projects rather than dependent on any one person's prompting instincts.
Why plain HTML instead of PowerPoint or a hosted slide tool? The decks we build will be handed to teachers whose classrooms may have no internet. A single self-contained HTML file opens in any browser with zero dependencies — that offline guarantee is the constraint that drives most of the technical choices in this suite.
The llm-dev plugin (linked on the slide) is
optional. If you use Claude Code, installing it gives you the
/llm-dev:cycle command directly; otherwise you
can just load the two small skill files into any LLM chat.
llm-dev:cycle, anyway?
llm-dev:cycle is just a
Two files drive the loop automatically:
SKILL.md and
references/phase-details.md
(found at
html-presentation-tutorial/skills/cycle)
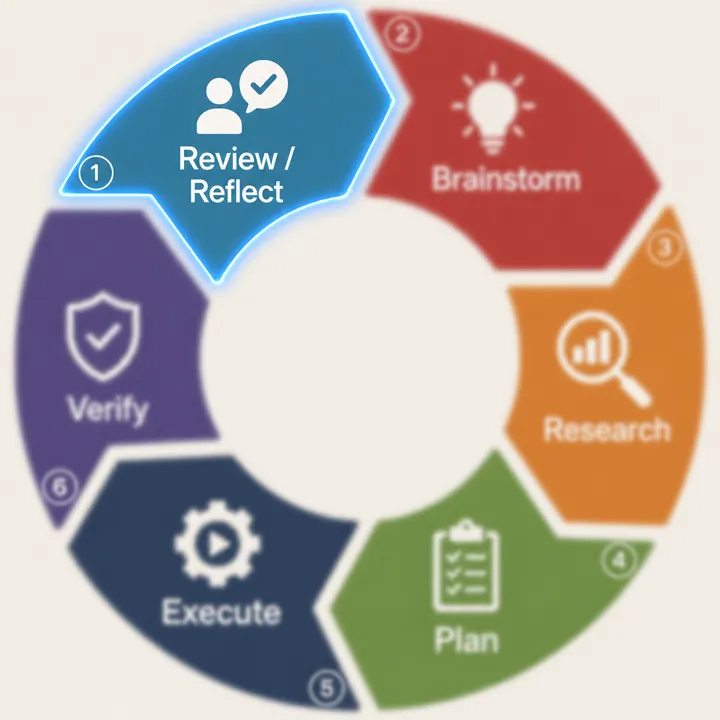
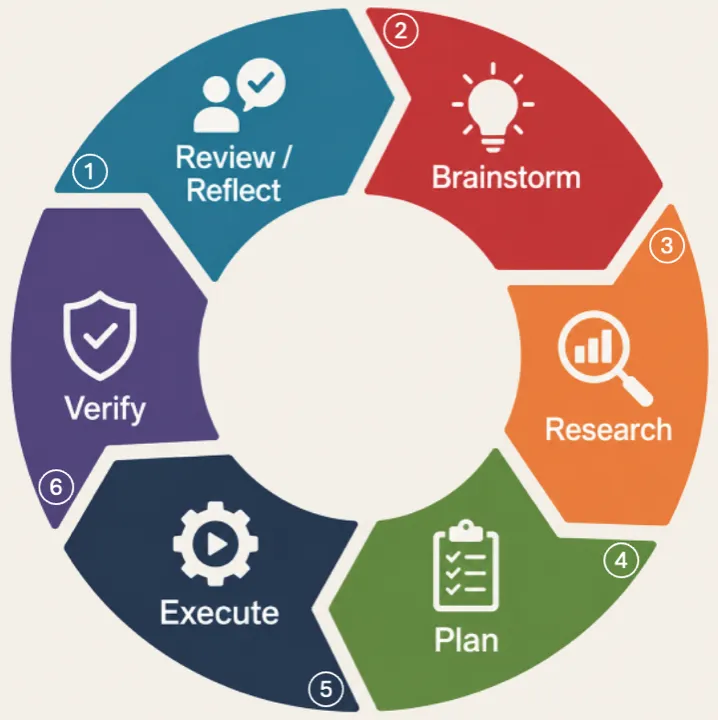
Here's a brief description of each phase:
If you decide in Phase 6 that your project needs
more work, llm-dev:cycle will help you
automatically iterate through another loop.
Ideally, each loop will be smaller and sharper than
the last. More about this later.
The core idea behind the cycle is making decisions before committing to code. Most of the value is front-loaded: thinking through what you're building, why, and how — before a single file is written — is what prevents wasted effort and rework.
Each phase ends at a gate: the LLM pauses and you approve before it moves on. Nothing here is rigid — you can revise a phase, skip one that doesn't apply, or jump back to an earlier phase if something changes. You stay in control the whole way.
The two files that drive this (SKILL.md and
phase-details.md) are short and human-readable —
worth opening and skimming once. Loading them into an LLM
conversation is what lets the model walk you through the
phases on its own. The next slide shows what each phase
leaves behind on disk.
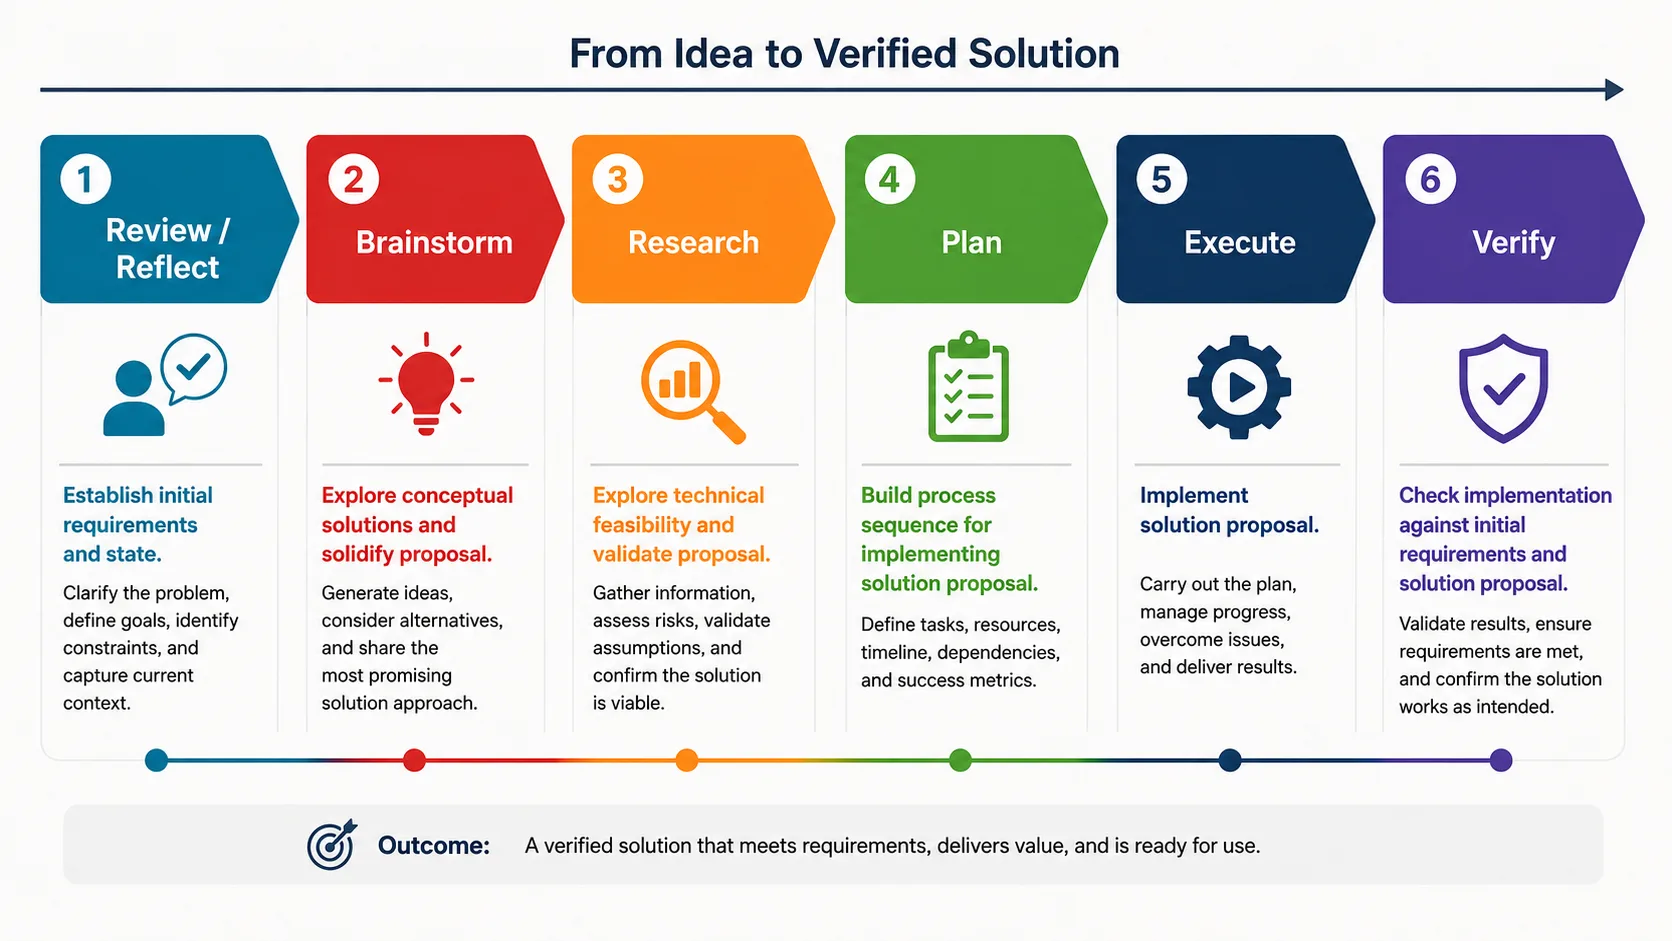
llm-dev:cycle is a refinement process
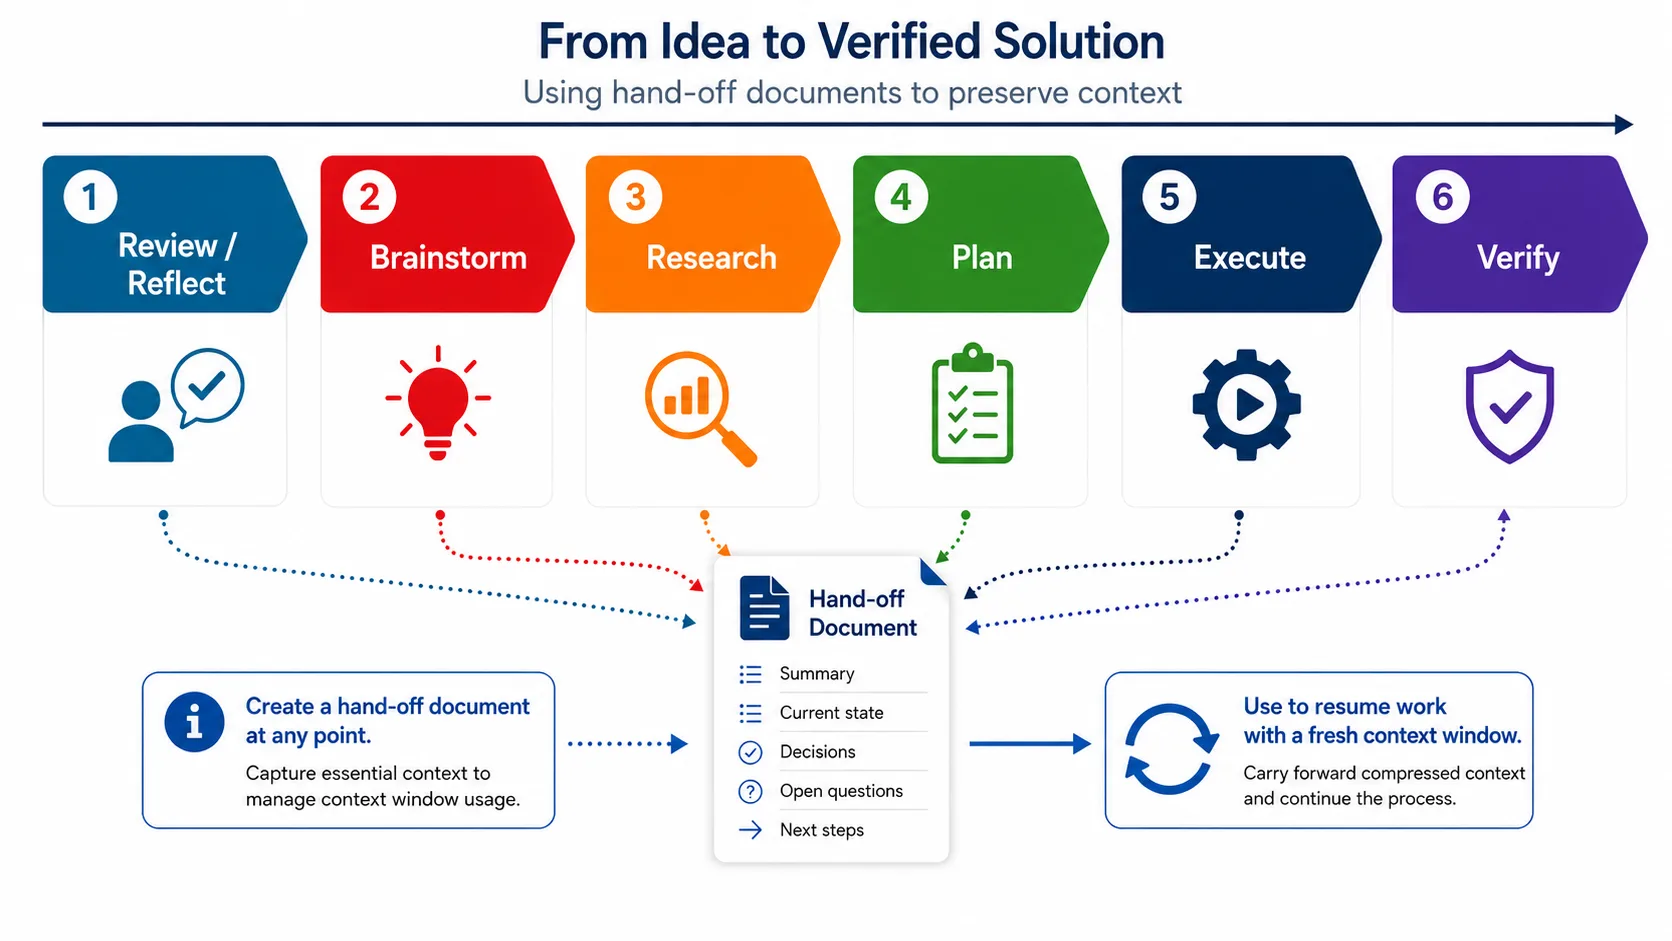
The previous slide showed the cycle as a loop, because in practice you iterate. This slide shows what one pass through that loop actually accomplishes: it takes a rough idea on the left and walks it, phase by phase, into a verified solution on the right.
The word to land on is refinement. Each phase sharpens what came before — Review captures the requirements, Brainstorm settles the concept, Research commits to a stack, Plan makes it concrete, Execute builds it, and Verify checks it back against the requirements you started with. Nothing here is a leap of faith; each step narrows the gap between intent and a working result.
The Outcome banner along the bottom is the point of the whole exercise: a solution that meets the requirements, delivers value, and is ready to use. When you finish a pass and it's not there yet, that's your signal to start another, tighter loop — which is what the next slides build toward.
llm-dev:cycle can be paused and resumed
The phase artifacts double as save points. Because each phase writes a markdown file (and each iteration gets its own folder), you can stop after any phase — when the context window fills up, when the day ends, or when you hand off to a teammate — and a fresh session can read those files and pick up exactly where you left off.
That's what the handoff / re-entry point in the diagram represents: the loop doesn't have to run start-to-finish in a single sitting. This matters most on longer builds, where one continuous LLM conversation would otherwise lose the thread as its context fills — the written artifacts are what let the work survive a clean break and a fresh start.
llm-dev:cycle automatically creates markdown
artifacts for each phase
These markdown files save your progress and create easy re-entry points for your project.
workspace/cycle/ ├── iteration-1/ │ ├── 1-review.md │ ├── 2-brainstorm.md │ ├── 3-research.md │ ├── 4-plan.md │ ├── 5-execute.md │ └── 6-verify.md ├── iteration-2/ │ └── ... (same six files) └── iteration-3/ └── ... and so on
Each iteration gets its own automatically-created folder, too.
Each phase writes a short markdown file, and each pass
through the loop gets its own iteration-N/
folder. Together they're a durable record of the project:
what was decided, what was tried, what was verified, and why.
This matters for two practical reasons. Re-entry: if you stop and come back days later (or hand off to a teammate), reading these files rebuilds the full context fast — no need to remember the chat. Reflection: when you start a new iteration, the Review/Reflect phase reads the previous iteration's files to decide what to do next, so the cycle builds on itself instead of starting cold.
This deck was built exactly this way — its own
workspace/cycle/ folder looks just like the tree
on the slide. (One note: the numbered filenames here, like
1-review.md, are a small convention we're adding
to keep phase order obvious; the underlying files are the
same.)
First iteration: Review and load context
and files to prime the LLM.
Subsequent iterations: Reflect on what's
been built, and guide the next session.
Treat the LLM as a highly competent design partner with zero knowledge of what you have in mind. Provide all necessary background information. This might include:
.pptx presentation files
This phase is about building a foundation for your
project and capturing it in
review.md.
In the next phase, you'll ideate and elaborate.
The mindset here is narrowing, not expanding — you're eliminating options and surfacing gaps, not generating ideas yet (that's the next phase). The quality of what you load in now sets a ceiling on everything downstream: garbage in, garbage out.
A few constraints are worth pinning down explicitly every time, because they cascade through the whole build: who the audience is, how the result will be delivered, and what it has to run on. For this suite, "offline classroom on a Chromebook" is the constraint that forced vanilla HTML and ruled out anything needing a server or network.
On later iterations, this phase changes character: instead of loading fresh context, the LLM reads the previous iteration's artifacts and reflects on what worked, what didn't, and what to change — then that reflection guides the new loop.
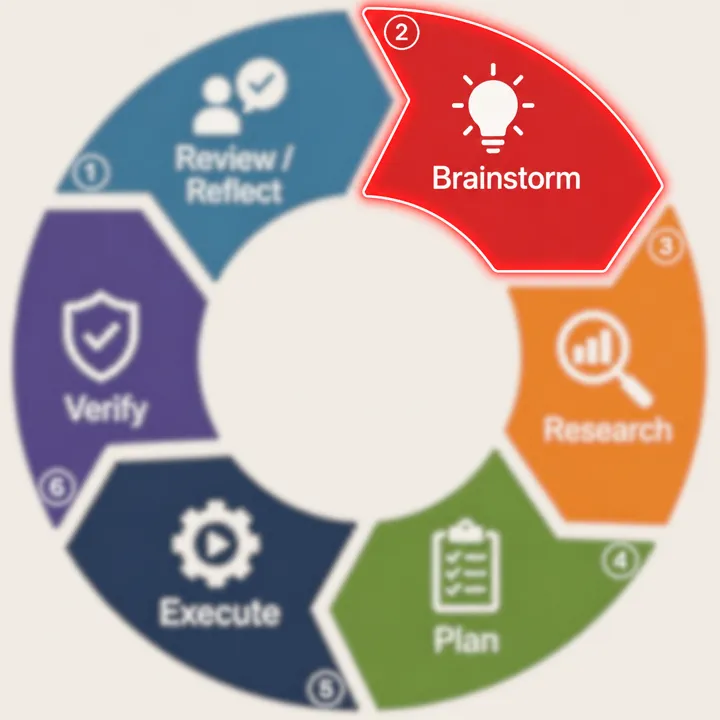
Explore ideas for your project with your LLM through conversation, Q&A, and divergent thinking.
Get creative. Ask questions and ask the LLM to ask you
questions.
You might think about the following:
The LLM will help you converge on one approach and then
write down the alternatives you considered and rejected,
and why.
Note: In Claude Code, this phase will offer a choice
between the superpowers:brainstorming
skill (if it's installed) and
llm-dev:cycle's built-in option. For our
summer work, llm-dev's built-in option
will suffice : )
This phase is about choosing a conceptual path
forward, which the LLM records in
brainstorm.md. In the next phase,
you'll consider and research technical
implementation options.
This phase is a dialogue, not a request. A good brainstorm has the model asking you questions and pushing back on your assumptions — not just handing you a menu of options. If your LLM isn't asking questions, prompt it to ("ask me anything you need to know first").
The output is a scoped concept with explicit boundaries: what you will build, and just as importantly, what you won't. Deliberately deciding what's out of scope (or deferred to a later iteration) is half the value here — it's what keeps a first pass achievable.
A useful technique: ask for the simplest version first, then decide what to add. For a presentation specifically, settle the narrative arc — the story you want to tell — before worrying about any individual slide. The DP explainer in Deck 2 is a good example: its eight-act story was designed here, in Brainstorm, before any HTML existed.
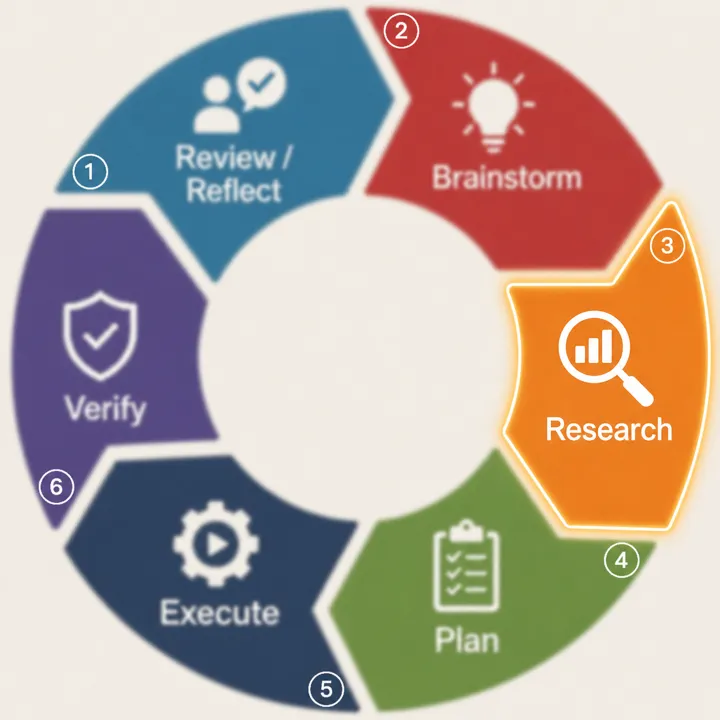
Work with the LLM to identify and verify tech stack, limitations, special considerations, etc.
This phase settles on a technical approach, recorded
in research.md.
In the next phase, your LLM will help you create a
detailed, step-by-step plan.
Research is where you commit to how you'll build, and verify that it'll actually work — before you've sunk time into building the wrong way. An honest caution: LLMs sometimes recommend libraries that don't exist, are deprecated, or won't run in your environment. Have the model confirm its suggestions, and prefer the simplest option that meets the need.
For most of our decks this phase is short — vanilla HTML/CSS/JS, reuse the starter template, confirm nothing reaches for the network so the offline guarantee holds. It gets more involved when a build has real substance behind it.
That's why the slide calls out interactive artifacts and understanding the math/algorithms/data. If you're building something that computes or animates (a chart, a simulation, a live demo), this is the moment to make sure both you and the LLM genuinely understand the underlying logic — not just that it "looks right." In Deck 2, the DP explainer's Laplace-noise math was worked out and verified here, in Research, which is exactly why the interactive demos behaved correctly later.
Generate an ordered build sequence informed by all previous phases.
Note: In Claude Code, this phase will offer a choice
between the superpowers:writing-plans
skill (if it's installed) and
llm-dev:cycle's built-in option. For our
summer work, llm-dev's built-in option
will suffice : )
The LLM records the plan in
plan.md.
Once it's solid, you'll move on to the Execution
phase.
The plan turns everything decided so far into an ordered, concrete build sequence — what gets built first, second, third. A good rule of thumb: if a single step looks like it'd take more than an hour, break it into smaller steps.
Acceptance criteria are the most important part of a plan and the part people skip. They're specific, testable conditions that define "done" — and they're exactly what the Verify phase checks against later. Write them as pass/fail statements, not vibes: "opens offline with no console errors" is a criterion; "looks good" is not.
Testing is planned here, not bolted on afterward. Make sure the plan builds in checks along the way. If you're not sure it tests enough, just ask the LLM directly — "does this plan include enough testing to be confident the build works?" Your role at the end of this phase is to actually read the plan and approve or adjust it; the LLM proposes, but you own the decision.
Build according to plan.md, testing each
piece as you go.
Note: In Claude Code, this phase will offer a choice
between the superpowers:executing-plans
skill (if it's installed) and
llm-dev:cycle's built-in option. For our
summer work, llm-dev's built-in option
will suffice : )
The LLM records results in
execute.md.
Once complete, you'll move to Verify for hands-on
build validation.
"Test early and often" is the whole lesson of this phase. Don't wait until the end to see if it works — check each piece as it lands. When something breaks, describe the problem to the LLM precisely: "this returns X, I expected Y," or "the image doesn't load." Vague reports ("it's broken") get vague fixes.
Even though the LLM writes the code, read it and ask for explanations until you understand it well enough to describe what it does. You don't need to be able to write it yourself, but you should not be shipping a black box.
In-line vs. subagent execution (the slide's trade-off): "in-line" means the LLM builds directly in your main conversation; "subagent-driven" means it spins off separate helper sessions to do chunks of work and reports back. Subagents keep your main conversation from filling up (useful for big builds), but each subagent only sees a compressed summary of the context, so it can drift from your original intent. In-line keeps full fidelity to what you discussed but uses up the conversation's memory faster. For most single decks, either is fine — don't overthink it.
Congratulations, you've built something!
Time to take it for a test drive.
Note: In Claude Code, this phase will offer a choice
between the
superpowers:verification-before-completion
skill (if it's installed) and
llm-dev:cycle's built-in option. For our
summer work, llm-dev's built-in option
will suffice : )
The LLM records the results in
verify.md.
If your project needs more work, start a new loop back
at Review / Reflect.
Verify exists because Execute reports on its own work — and
anything self-assessed deserves an independent check. The
rule is evidence before assertions. "It
works" is not verification; "I opened it offline via
file://, clicked through all 12 slides, the
console was clean, and the Network tab showed zero requests"
is. Walk each acceptance criterion from the plan and confirm
pass or fail with real evidence.
Test it the way your users actually will — for us that means the same kind of device (a Chromebook) and the same offline conditions a classroom would have. A deck that works on your fast laptop with wifi but breaks on a Chromebook with no network has not been verified.
This is also where your judgement comes in, beyond the checklist: spend real time with what you built, tell the LLM everything you like and don't like, and decide whether you're genuinely happy with it. If it falls short, you don't mark it done — you either fix it now or carry the issue into the next iteration. That decision is what kicks off another loop back at Review/Reflect.
Gates are guided, not rigid. At each phase you say "next," "revise," "skip," or "back" — you stay in control.
Iterate through the loop at least once, but don't let the structure slow you down. (To build the slide deck that you are currently viewing, Claude and I completed a single cycle and then moved across the deck polishing slides until coherence emerged.)
Parallel dispatch when work is independent — e.g. summarizing several reference docs at once. The skill suggests it; you decide.
Three things shape what using the cycle actually feels like day to day:
Gates. The model proposes and you approve at each phase boundary. In practice you'll say "next" a lot, sometimes "revise this," occasionally "skip this phase" or "go back." Not every phase deserves equal weight — a simple deck might breeze through Research in a sentence, while a complex build lingers there. You decide where to spend effort.
Iteration. Plan to go through the loop at least once, but don't let the ceremony slow you down. Real work is messier than the diagram: this very deck was built with one full cycle, then a long stretch of moving back and forth across the slides polishing copy and layout until it felt coherent. That's normal and fine — the structure is a tool, not a rule.
Parallel work. When subtasks are genuinely independent — say, summarizing five reference documents — the LLM can fan them out and work on them at once instead of one at a time. The skill will suggest this when it applies; you decide whether to take it.
Launch Slide Deck 2 for a detailed walk-through of HTML
presentation and artifact creation using
llm-dev:cycle.
Head over to the private ASWP Summer 2026 Presentations repo to get started building on your own.
New here, or not in the ASWP org? Read the public Getting Started guide — no account needed.
Read the Getting Started guide →
Optional, but recommended: install the
llm-dev plugin for Claude Code ·
github.com/DallasElleman/llm-dev
(a reference copy of the skill is bundled in this repo under
skills/cycle/)
Concrete next step: copy the starter/ folder
from the repo, open its index.html in a browser
to see the template, then start a cycle on a real topic you
need a deck for. The starter is a re-themeable, fully offline
skeleton — scroll-snap slides, keyboard navigation, the
presenter view, speaker notes — so you're not starting from a
blank page.
To run the cycle yourself: if you use Claude Code, install
the llm-dev plugin
(github.com/DallasElleman/llm-dev) and invoke
/llm-dev:cycle. If you're working in a different
LLM, just load the two skill files
(skills/cycle/SKILL.md and
phase-details.md) into the conversation and ask
it to walk you through the cycle.
Then keep going with the suite: Deck 2 narrates a real build end to end — actual transcripts and cycle artifacts — so you can see all of this applied before doing it solo. Deck 3 covers making your slides richer and better-sourced. Don't aim for perfect on the first loop; build something, then iterate.